This is a very special day, folks! I am so excited to share my very first Make It Monday video for Papertrey Ink with you. It is such an honor for me to make one of these videos…really a dream come true.
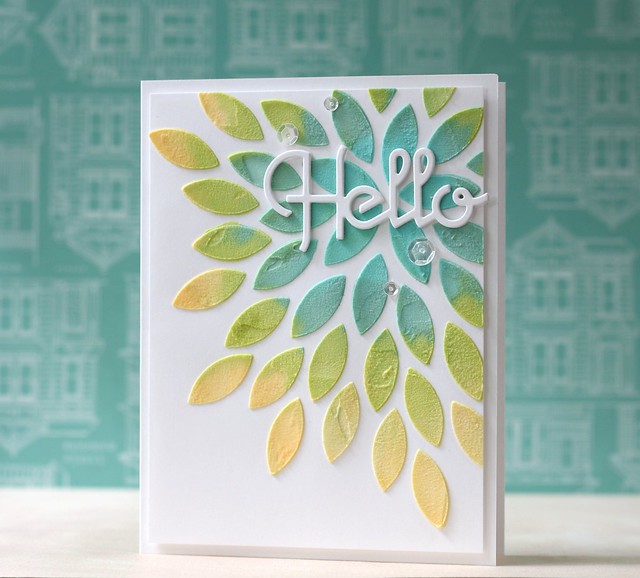 I used Papertrey ink refills to color my embossing paste as well as creating my own stencils from various dies. For this one I used the Mighty Bloom cover plate die.
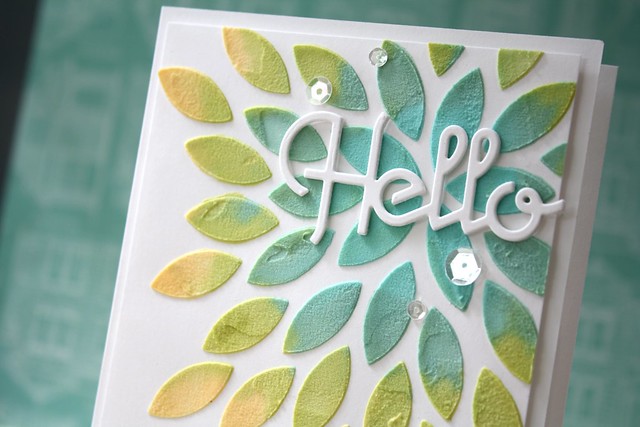 Being able to create your own stencils with dies gives you endless possibilities.
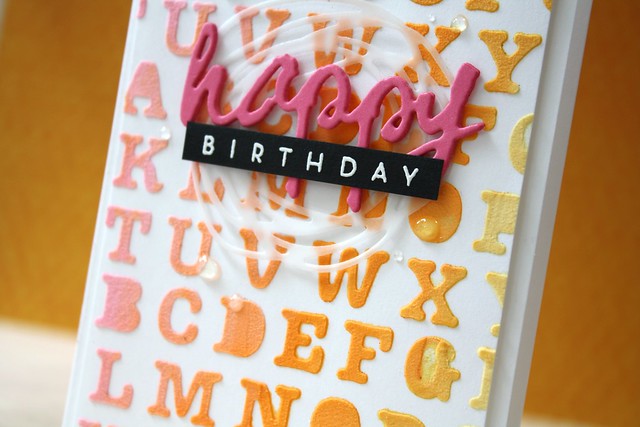
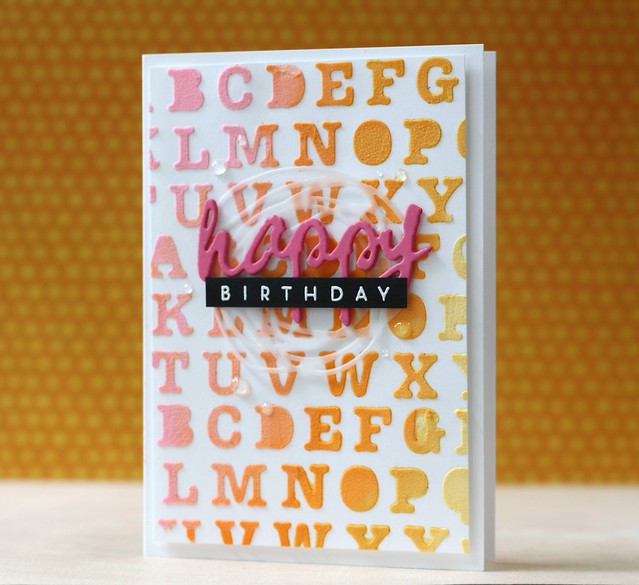 For this card I used the Polka Dot Parade Uppercase Alphabet dies to create my stencil.
 Here’s my video….squeeeeel! I’m so excited to finally share a Make It Monday video.
Head over to the Papertrey Ink blog for more information about playing along with the challenge. You could win a $25 gift certificate to Papertrey Ink. Don’t miss out! I’d love to see what you come up with! Thanks so much for stopping by!
                         |


Gorgeous cards, Laura! I love the dies you chose, and how you transitioned the colors on each of them…so pretty!
I’m so excited that you’ve created a video for PTI, too…off to check it out!
Love, love, love these!!
Soooo very gorgeous! Both cards! Thanks for sharing your talent & inspiration!
Love your cards.
Very nice results, but the effort to get there is WAY too messy and too time consuming for me!
I just finished watching a tutorial by you on YouTube and then headed to catch up on my blog reading and lo and behold, here I find another beauty by you! LOVE your stunning clean and simple card. The choice of colors are absolutely gorgeous!
You rock this card with DIY colored embossing paste, Laura! Congrats on your first PTI video! I hope to see more –most definitely!
Yay! Congrats!!! on your first Make It Monday video, Laura. Love it and love your cards, the colors are exquisite. Can’t wait to try this out.
Good grief girl. Do you EVER have any down time? But this method is soooo worth it. Really makes stunning cards…people will wonder how you did that. Just beautiful. Congrats on a stellare first Make It Monday video.
Ummm, totally gorgeous! You never cease to inspire, Laura!
Holy gorgeous amazing.
Thank you Laura, a make it monday video, best b-day present yet!
Gooooo papertrey inc !
Laura, GREAT video! Super job, and I love your projects. Can’t wait to see more of you!
Laura, I love your work. Making your own stencil and coloring the embossing paste produced the most beautiful card. I look forward to your blog every day. Thanks!
Yay for your first MIM! Now I can’t wait to get inky and pastey! 🙂
What a great “first” video for PTI! Love all the dies now for making your own stencils for this technique. Got to try this…hope my embossing paste isn’t too old.
The aqua, green and yellow flower, then the pink, orange, and gold alphabet are stunning! Beautiful use of color and diecut/stamped greetings!
Laura, you and PTI are a match made in “Doublestick Heaven”!!!!
You are so stinkin’ cute! I could listen to your videos all day long. Congrats on your first Make it Monday video for PTI.
Thanks so much for sharing the how-to’s! I especially like how you did the “hello” card 🙂
you totally rocked your first MIM!!! I love this!
I adore these cards, Laura … love the graduated colour! Thanks so much for an awesome MIM video … and congratulations on your first very splendid one! Anita 🙂
I love your style of presentation. I felt I was right there with you. In addition beautiful card and great technique! Keep up the great work.
Stunning cards..such a great idea..love it..great video too!
always love your videos!!
Laura awesome job on your first MIM video! You chose gorgeous colours!!
Fabulous cards with awesome texture and color! Wonderful video…thanks so much!!!
What a beautiful card! You did a FAB job on both!
Ooh! What fabulous projects to kick off your stint at PTI! These are both awesome!
You’re a natural, Laura! These are absolutely gorgeous. Love, love, love!
Gorgeous cards, Laura. Love the ombre look. Congrats on your very first MIM video. Looking forward to many more!
Tonight’s the night. It’s my night off from putting the little one to bed, I now own embossing paste, and I cannot wait a moment longer to try your technique out. I’ve always adored your cards using embossing paste (and every other card you’ve ever made ever for that matter), and I cannot wait to try it out. Wish we were neighbors and we could try this project together (I’d bring you chocolate), but the video is a great second best option. 🙂
Love the leaves and colors embossed. Great technique and choice of colors. Thank you for sharing!!
LOVE your idea!!
glossy accent dots…..who woulda thunk…..love it. Thank you for it.
Congratulations on a great video for PTI. These cards are amazing. I’m so happy to see how to make my own stencil from dies. Thank you.
OMG!!! You are totally wicked with all of your card creations. I love today’s ideas – make your own stencils and using an alphabet die …. I’m thinking I have an alphabet die that is still together and I can totally do this. Thank you!!
It’s about time they let you be featured!! I was so disappointed when your name was not listed among the Stamp-A-Fair instructors. Great cards. Love your stuff!!
Soooo gorgeous!!! Thanks for the vidéo!! 😉
Awesome first video…always enjoy them. Stunning cards.
How fun! Gorgeous card.
Love the cards. Great colors!!!
Great video for your debut on Make It Monday and beautiful cards!
Laura, I always love your ideas. These are no exception. I bought the embossing paste goodness knows how long ago, buut your colours have me totally inspired. Time to crack the cap and give it a go.
Gorgeous cards! Congrats on your first MIM video! I adore your designs and love your videos, thank you!
Gorgeous cards – absolutely love both of them. Great video too! Thanks for sharing.
I love your creations, very inspiring!! I have made a post with ref to an old post of yours today on my blog. Today I got even more inspiration on a similar look with completely different technique, awsome! Thanks a million for sharing.
Your blog is one of my favourites! Love your style of crafting. Another fabulous card and great tutorial. Thanks.
http://millanspyssel.wordpress.com/2014/08/12/lifting-laura/ Sorry, thought my comment would lead you to the blog, but could not see it actually did…….
All the best
Camilla
Yeah, Laura! 🙂 These cards are gorgeous. Love the pretty colors and your video was really fun to watch, too! Thanks! Have a great day! XO
Your videos are not only inspiring and educational but also highly entertaining and lots of fun! Thanks so much!
like your video…..and really like that scribbles die!
stamping sue
http://stampingsueinconnecticut.blogspot.com/
I finally had a minute to watch this video and WOW, awesome technique and video! Congrats on your first MIM video, can’t wait to see more!
Hi Laura, I look forward to watching your vidoes because I love the way as you say “babble on”!! Makes the videos more enjoyable instead of just watching someone give a play by play on the project they’re making. I also love your realness!! Keep up the great job!!
What a great video and card!!! Your videos are always fun and informative to watch. The card you designed is one of my very favorites ever!
Lovely card. Those colours are so beautiful together.
Congratulations on your first MIM video. I can tell yours are going to be some of my favorites, as I always love your videos. What a cool technique. Only one teeny ‘complaint’–where is your cutie patootie helper? I kept straining to see a peek of sweet Emma, but she was nowhere to be found. Don’t tell me she’s off to school already?
You are a natural! Great video and beautiful card!
I’vebeen making some stencils with acetate–works great. Great video.
That is the first MIM video I have watched in forever! thanks Laura for sharing this fabulous technique with us x
Great cards, great technique and an amazing video as always Laura simply adore your videos.
Love your video. You explain it so well and seem very down to earth~ I would like to know where you got your spreaders for your embossing paste. Would love to try this technique~ 🙂
Love your video. You explain it so well and seem very down to earth~ I’d like to know where you got your spreaders for your embossing paste. Would like to try this technique~
I’m sorry I hit the button too soon on my first comment.
The colors look really pretty
That’s inspired me to get back to card making . And congrats on your first video , it was fun listening to you & your content was terrific. Many thanks xx
Pingback: Trend Watch – Focal Point Greetings :: Paper Crafter's Library
Pingback: Pink Embossing Paste Projects | honeybeelane
Your cards are beautiful. Thank you for the video.
Pingback: Introducing Happy Spooky Halloween, Dangled Stars Dies and More – Papertrey Ink